OBS – Live Stream
How I created it?


To begin with, I had roughly designed a yin-yang logo as I wanted to go with something more creative and unique, rather than just simple. Choosing the yin-yang was a lot better in my opinion as the design of the yin-yang also gave off quite a creative design. These swirls collide together and fit perfectly, fitted with the 2 dots that er opposite one another but fit the opposite colour is also a nice touch and another reason why I think the yin-yang is a unique design.
After designing the logo and testing around with the fonts, the logo above shows a short animation of the final piece. The design logo goes from its chosen original colours to a grey and white colour, with a short twirl through the middle showing the light illusion effect.
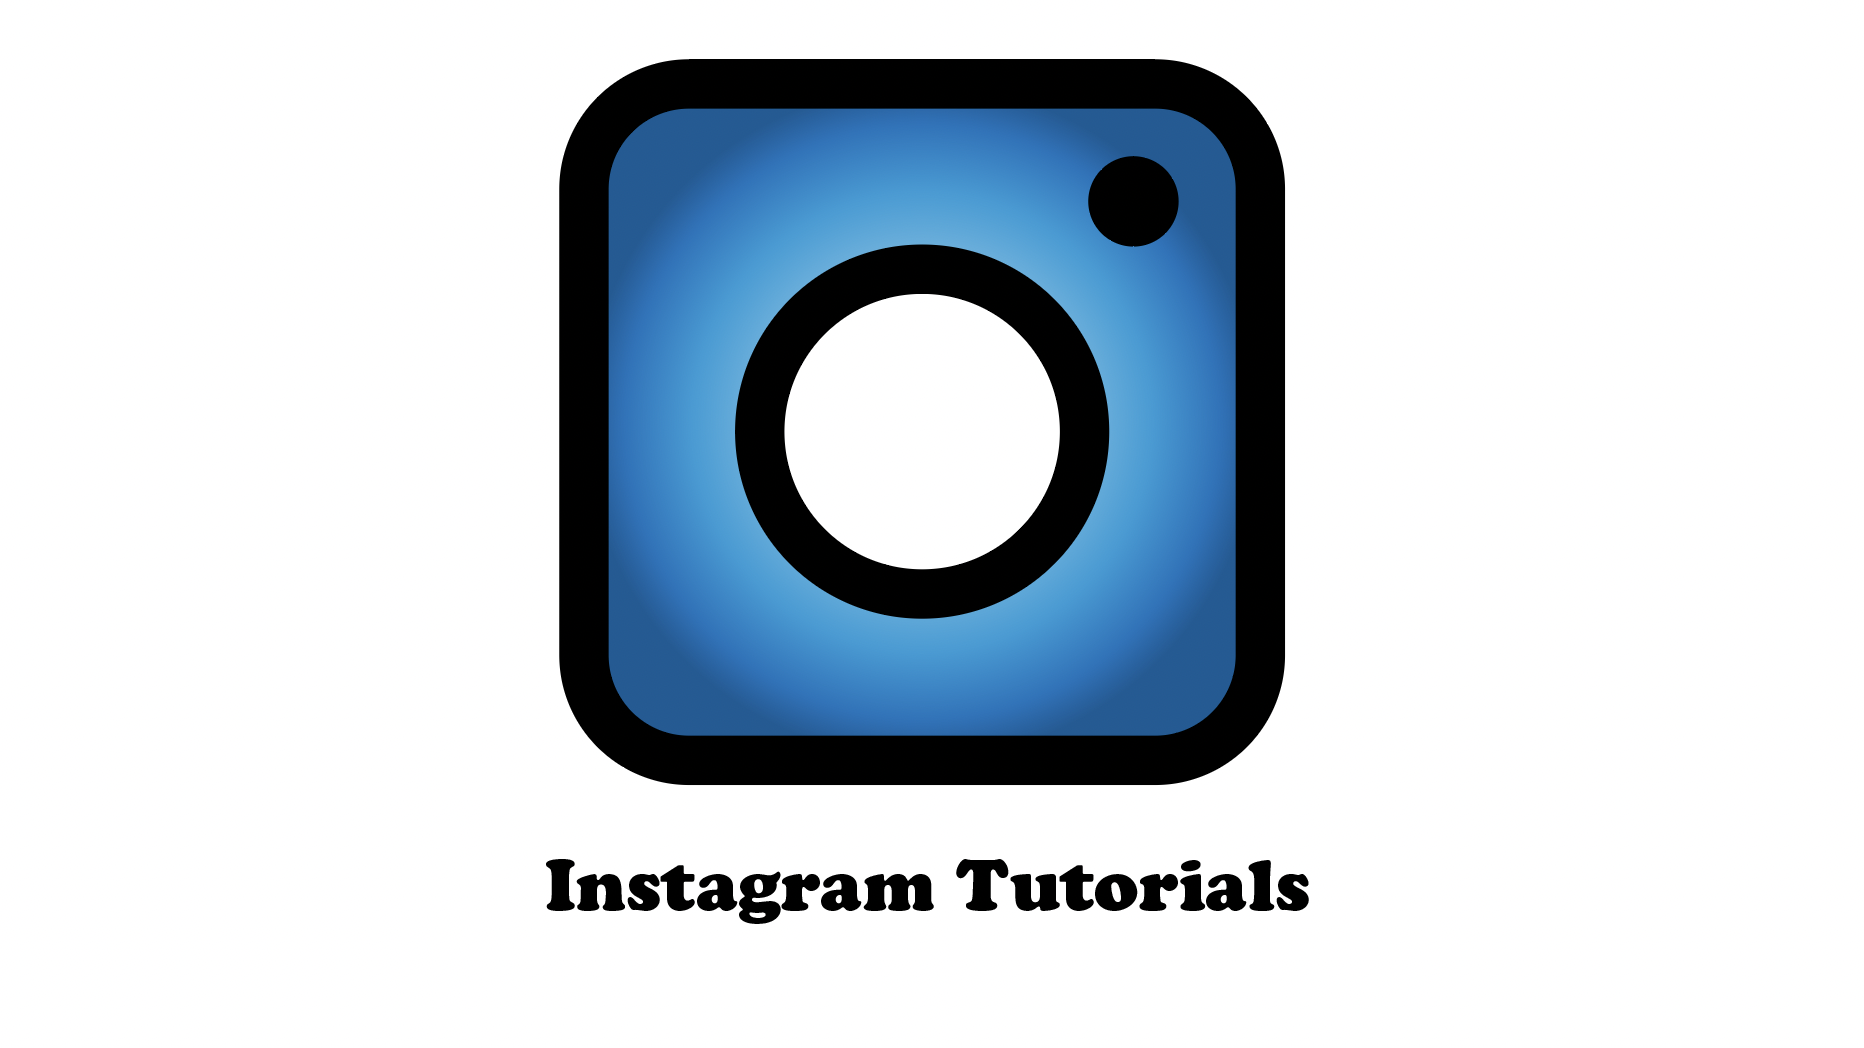
I then wanted to try out another design before making my final decision, creating a design with the same similarities to the original Instagram logo, I created the above logo myself using the Instagram outlines, then added my shadings and effects to the colour scheme. Following this, I also then added a different font style to see the results.
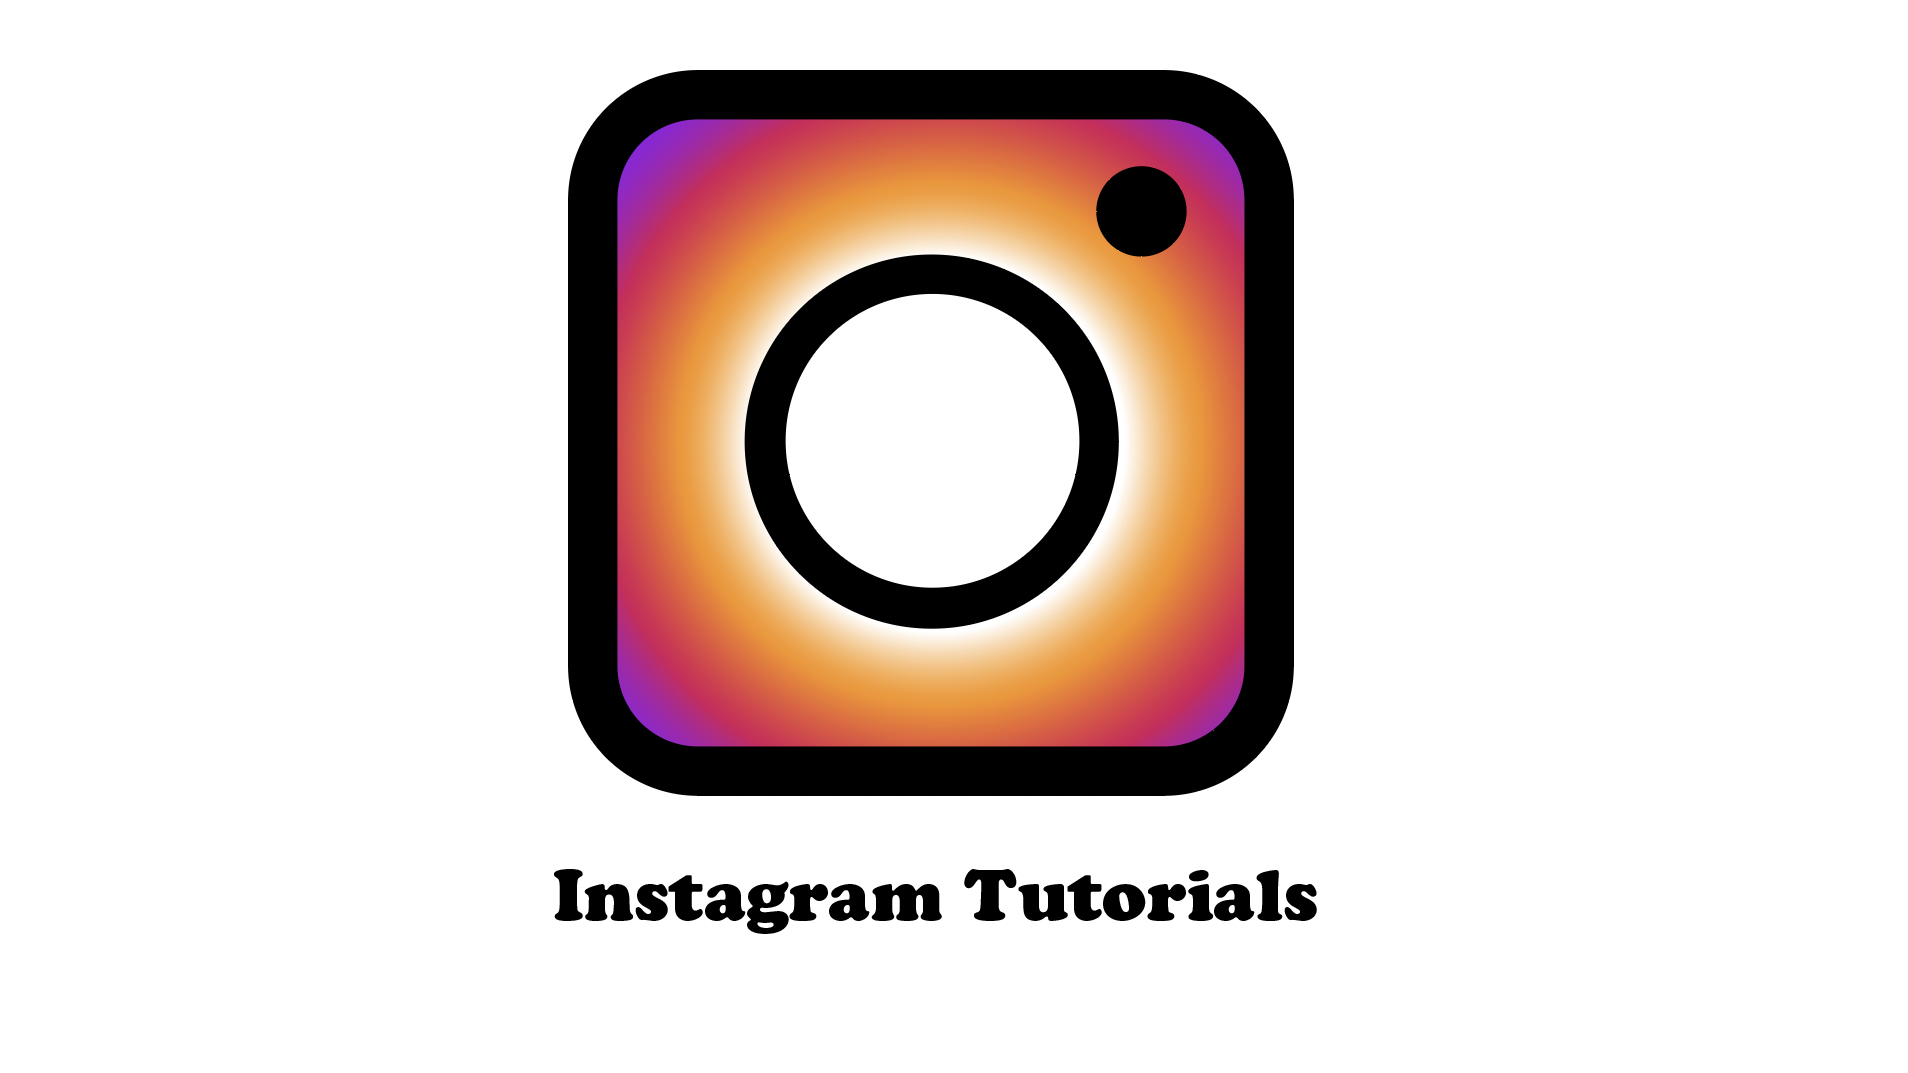

I found that the blue shadings used in the previous figure did not fit the Instagram look, so I went ahead and tested out the same colour ranges Instagram uses on its logo to my logo, but keeping the shading levels and forms the same as my own so that the Instagram logo was still the same as the original, but slightly changed so that it became my style. I found that the white circling from the centre going out of the burst colours gave a vibrant and lovely sunset design which what had drawn me into this final design look.
I then added a different animation form and added in my chosen audio for my intro, added all these features together through Adobe Premier, and finally put together my logo intro. The same steps done for my logo intro was done for my logo outro, this step was done to keep the same design throughout the entire video, giving a more professional look rather than two split designs which can come across as un-organised.
Using OBS
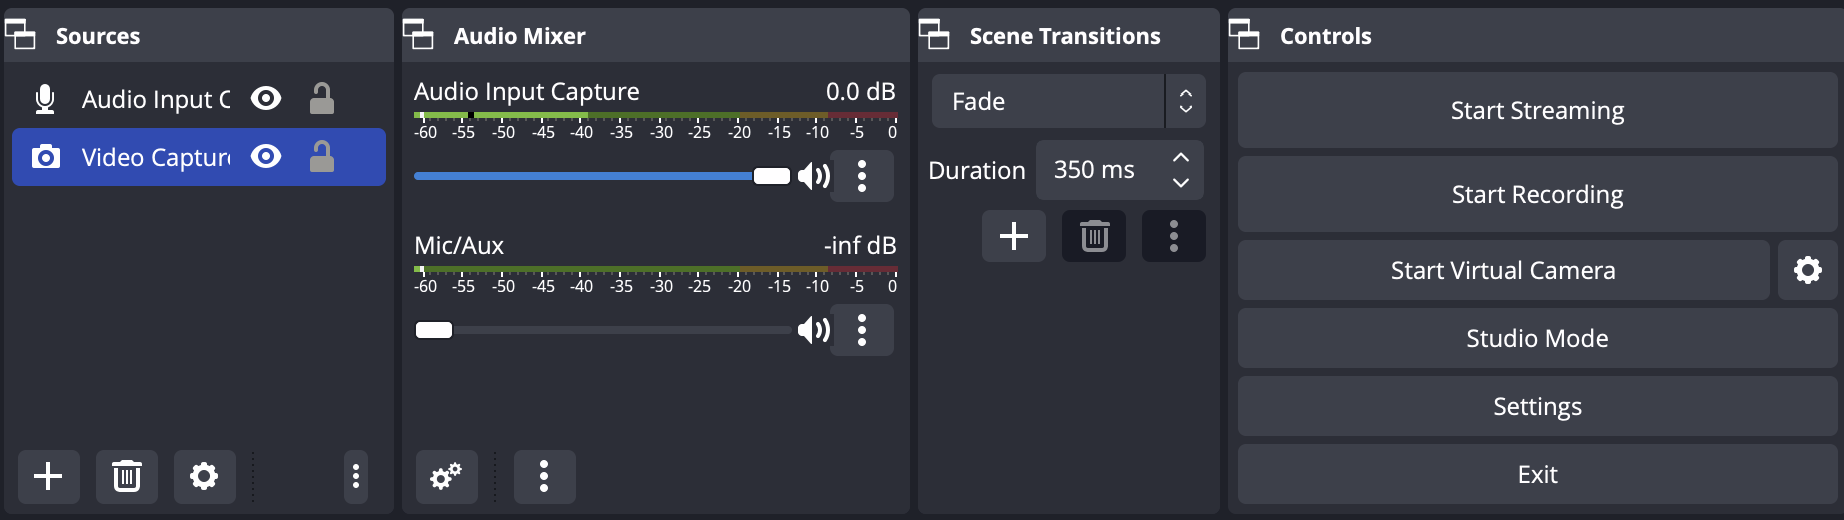
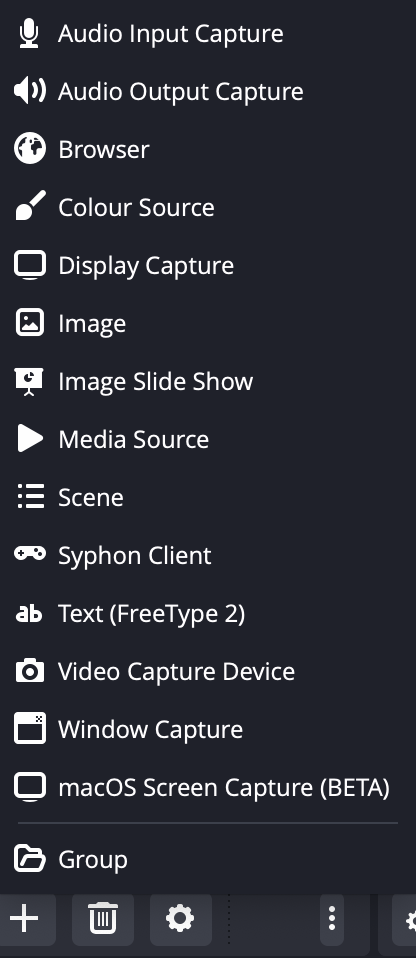
The following images above were tools OBS provided when doing your live stream through its programme. The tools give the user a variety of different ways to broadcast and stream your chosen resources depending on your video’s goal. For my video, I used the audio input amongst all my scenes, with the media source display to show my screen record, and the Video Capture Device to live stream my selfie intro and outro video.
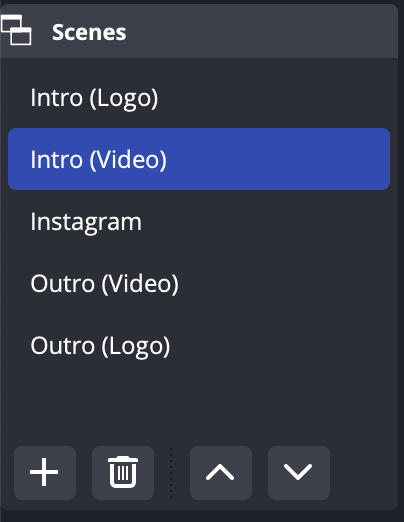
The scenes we were assigned to do were 5 different videos, these include the first scene which is your logo intro with a simple animated video of your designed logo, an intro video using the selfie came to record yourself doing a short intro for your video (introduction), followed by the purpose of your video (mine being the Instagram tutorial on how to simply upload to your Instagrams story), and then the same outro selfie and logo again at the end of your live stream the same way recorded for your intro.
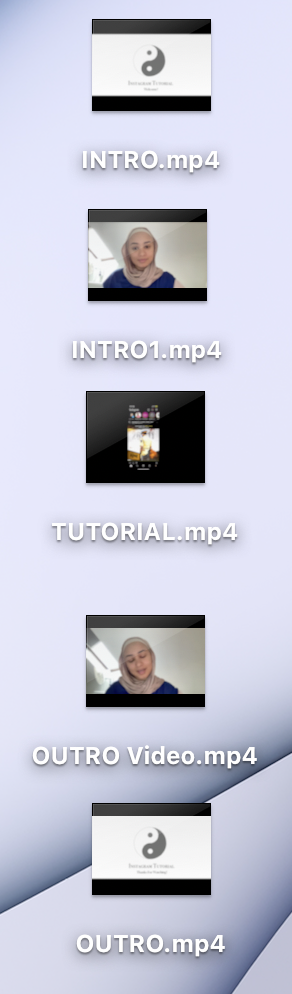
Once the videos were recorded through OBS separately, they would be saved depending on your selected area through settings on where you wanted your videos to be saved. Mine were through my desktop so that I could visually see what had been recorded, and what was missing.

Taking each recorded video from OBS into Premier, I then edited each one to make the videos flow a lot easier through each scene. Some videos had a long pause at the being before actually playing the video, so for this, I had using the ‘razor’ tool to cut off that selected area and trimmed down the video to allow less waiting time wasted. Doing this edit will increase my user experience as it avoids the user having to wait until the video gets to its point.

I then further edited my logo intro by adding in the text and some small tweaks to the animation, making the intros flow between scenes easier, Premier allowed this feature as it gives you more of an editing space rather than OBS, these features can not be found there as OBS only allows you to live stream and record live.


I then recorded all the scenes together through OBS and then take the final video to Premier and edited the start and finish of the video, uploaded it to Youtube for it to then be public to my viewers.